

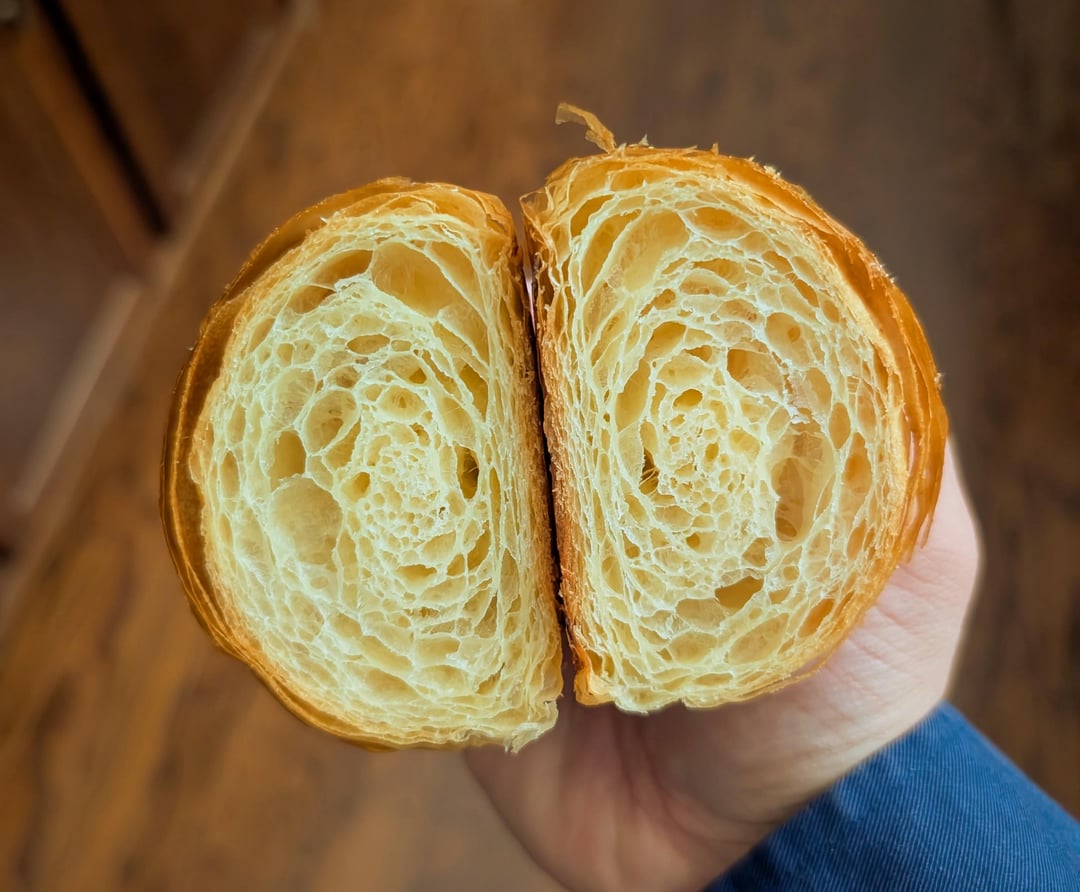
It's been a long 4-month road to get to this point. The recipe is just about at the finalized point now. I got some of the best lamination I have ever had by hand. I used Kerrygold unsalted butter for this.
by charonill
It's been a long 4-month road to get to this point. The recipe is just about at the finalized point now. I got some of the best lamination I have ever had by hand. I used Kerrygold unsalted butter for this.
by charonill
5 Comments
Hand Laminated Croissant Recipe
Makes 6 Large Croissants or 8 Medium Croissants
Dough Ingredients:
* 90g AP Flour
* 240g Bread Flour
* 160g Cold Water
* 50g Sugar
* 7g Salt
* 7g Instant Yeast
* 7g Instant Milk Powder
* 38g Unsalted Butter (Softened, or partially melted)
Butter Sheet:
* 190g Unsalted Butter (82% fat minimum)
Egg wash:
* 1 whole egg
* 1 tbsp milk
* 1 pinch of salt
Instructions:
1. Mix together all dry ingredients.
2. Add water, milk, then butter. Mix to combine
3. Knead until combined, supple, but not completely smooth (3-5min on standmixer speed 2).
4. Flatten dough out a bit and put into an airtight plastic bag. Place dough in the freezer to chill.
5. Get butter block and flatten into a rectangular sheet (roughly 5in x 8in) between parchment paper. Make sure the sides are fairly straight and have even thickness across the whole sheet. Place the butter sheet in fridge to chill at least one hour.
6. Once dough and butter sheet has chilled for at least one hour, or the dough surface registers 35°-40°F and the butter registers 50°-60°, withdraw both from the fridge.
7. On a well floured surface, roll out the dough into a sheet just slightly wider than the long side of the butter sheet and 2 times the length of the short side. Try to get square corners at the ends of the dough sheet.
8. Place the butter in the middle of the dough sheet. Fold dough over the butter from both sides so the seam of the dough meets at the middle. Try to avoid having too much overlapping dough. Pinch along the seam to seal.
9. If the dough/butter sheet is still cold, start rolling out the dough sheet in a perpendicular direction to the folds. (If not cold, place back in bag and then into the fridge for one hr). Roll out dough sheet to 15-18in in length. Flip the dough sheet over a few times as you roll to keep the thickness of the layers even. Keep the sides as straight as possible.
10. Trim off the ends that are mostly dough to form square ends. Gently brush off any excess flour from the dough surfaces with a brush. Can also brush with a very light layer of water to help ensure adhesion.
11. Do a single fold (letter fold, or fold 1/3rd).
12. Place the dough back into the bag and then into the freezer to chill. After 30min, move to the fridge. If you have an ice mat or other cooling tools, place those on your rolling surface now.
13. Once chilled, with a dough surface temperature between 40°-50°F, retrieve the dough from fridge and place back on a floured surface. Start rolling out the dough in a perpendicular direction to the last fold to a length of 18-21in. Keeping the sides as straight as possible. Flip the dough sheet over a few times as you roll to keep the thickness of the layers even.
14. Square off the ends of the sheet by stretching or trimming. Gently brush off any excess flour from the dough surfaces with a brush.
15. Do a double fold (book fold, or fold in 1/4): take the each end of the dough sheet and fold to meet in the middle, then fold in half.
16. You should now have a dough with 24 layers of butter.
17. Place back into the bag and return to the fridge. Chill overnight for a cold ferment (8hrs minimum).
18. 30min before you are ready to retrieve the dough, place any cooling tools on your rolling surface.
19. Retrieve dough from the fridge next day and place onto a well floured surface. Roll out dough into a rectangular sheet about 4-5mm thick (a bit under ¼ in) and about 17in x 12in. Flip the dough a few times during rolling to ensure even layer thickness. Let the dough rest a few minutes if it starts to fight you and bounce back significantly after a roll. If the dough gets too warm, place back into the fridge for 10-15min to chill back down before continuing to roll. Once rolling is done, let the dough sheet rest for 20min. Place any cooling tools/ice mats over the dough while resting if available.
20. Using a sharp knife (or pizza cutter), trim off the end of each side to form a rectangle with sharp corners. If making 6 large croissants: using the knife/cutter, cut the dough into 3 rectangles along the short side of the dough. Then cut each rectangle into triangles by going from corner to opposite corner. You should have 6 long triangles. If making 8 medium croissants: using the knife/cutter, cut the dough into 4 rectangles along the long side of the dough. Then cut each rectangle into triangles by going from corner to corner to form 8 smaller long triangles.
21. If the triangles are getting too warm (above 60°F), put the dough triangles on a lined baking tray, cover with foil or plastic wrap, and then place into the fridge for 15-20min to chill the dough.
22. Retrieve from fridge and do the following one triangle at a time.
23. Gently stretch the dough triangle longer by running along the dough between your fingers and your thumb, while holding the base with the other. Flatten about 1in of the tip.
24. Use a knife and cut a 3/4in notch into the middle of the base of the triangle (optional for more curved croissants). Grab the corners of the base and stretch sideways to form a shape like the Eiffel tower.
25. Brush off any excess flour from the surface of the dough. Brush the top lightly with a thin film of cold water if needed.
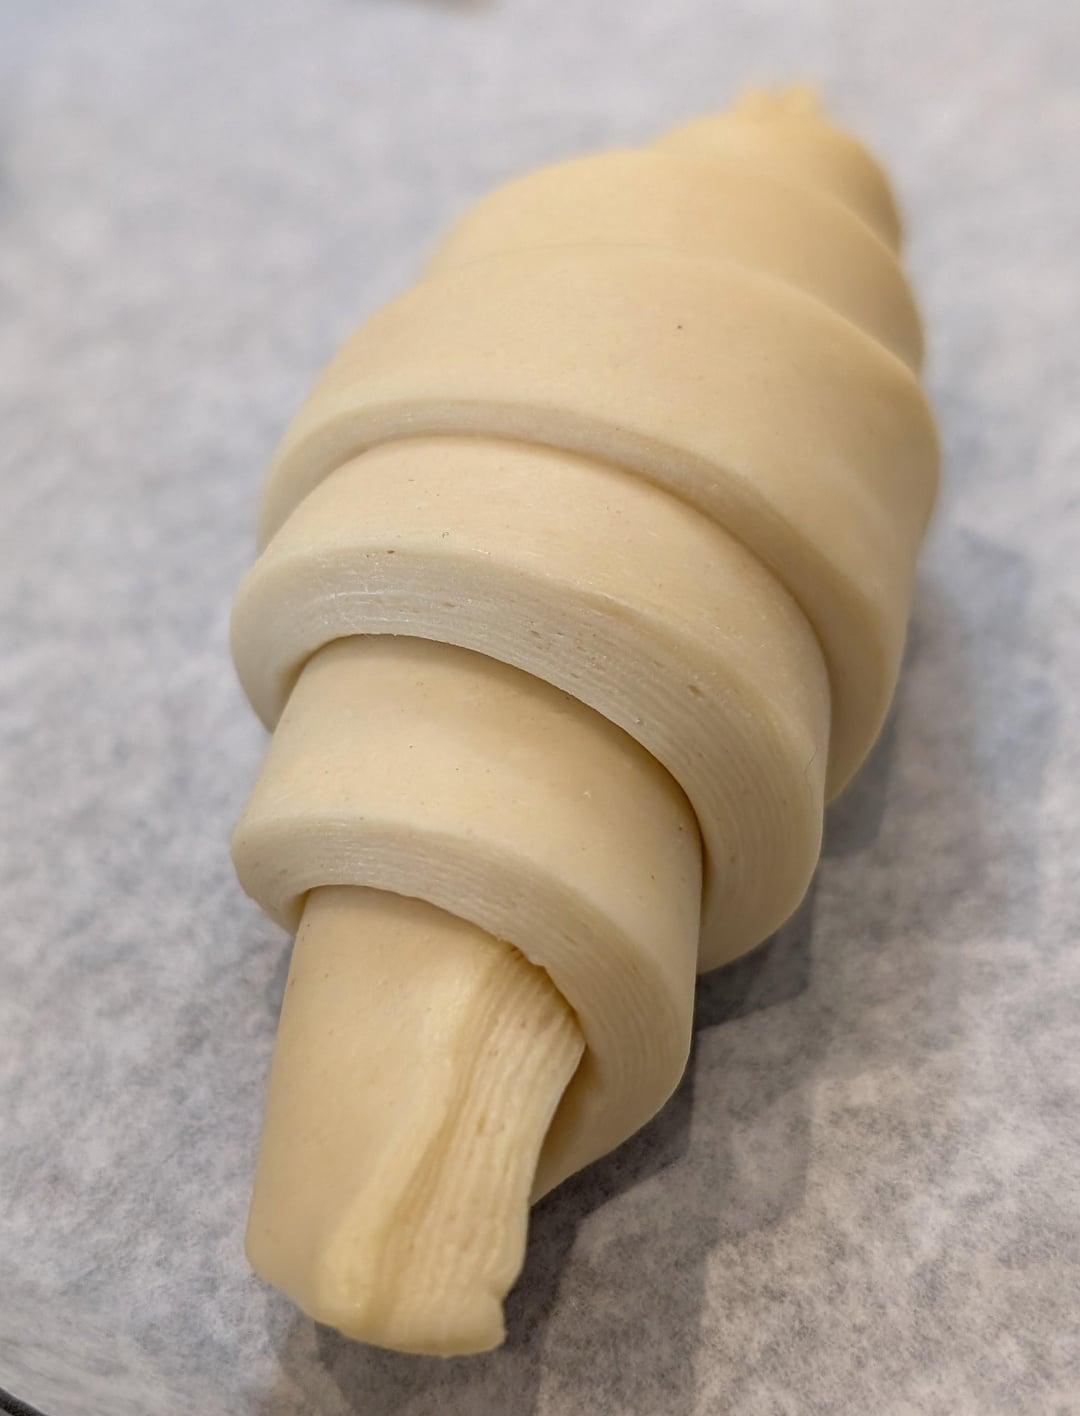
26. Take the bottom edge and carefully roll upwards to the tip. Make sure the shaped roll is snug, but not overly tight, and do not press down as you roll. Place the shaped roll with the flattened tip of the triangle at the bottom on the lined baking tray, you may press down slightly from above to make sure the shaped croissants stay in place.
27. Repeat steps 23-25 with all remaining triangles.
28. Space the shaped croissant rolls so they are at least 1.5-2in apart.
29. Place the tray into a cold oven on the middle rack. Boil 1 cup of water in a small pot and place on a rack at the bottom of the oven. Close the oven door and do not open or it will let out the moisture.
30. Proof the croissant dough anywhere from 3 to 4.5 hours (depending on temperature in the kitchen). Proofing time might be shorter if the kitchen is particularly hot (3 to 3.5 hrs. You will need to test and adjust for your kitchen as needed). The proofed croissants should be incredibly swollen, at least double in size, jiggle very freely when the tray is wiggled, the laminated layers should be splitting apart, and the shoulders between each level looks to be melding into the next level.
31. Retrieve the tray with croissants from the cold oven. Remove the pot of water (should be cooled to room temp now). Start the oven and preheat to 415°F (375°F if using convection baking).
32. Place the croissants into the fridge for 10-15min to chill the butter slightly (very helpful if the kitchen is really hot).
33. While the oven is preheating, combine one whole egg, 1 tbsp milk, and a pitch of salt. Beat until homogenous to form an egg wash. The salt denatures the egg proteins slightly to make the egg wash more uniform.
34. Once the oven is pre-heated, or after the croissants have spent about 15min in the fridge, retrieve the shaped croissants from the fridge and carefully brush the tops of the proofed croissants with the egg wash.
35. Place the tray in the oven. Turn the oven temperature down to 400°F. Bake for 15min at 400°F. Then turn down the oven temperature to 350°F and bake for an additional 5-10min or until desired color is reached. This whole part is highly variable depending on your oven, so it may require some testing to find the best combination.
36. Remove croissants from the oven and let cool for at least an hour or two before slicing.
They look absolutely amazing
SHOW ME YOUR WAYS YODA !
Wow.
I think most don’t realize how much time/prep/etc is required for home made croissants.
ohhhh fuck! yeah i would!