DAY 1:
Add 150 grams of warm water (90°F-100°F, 32°C-37°C), 150 grams of bread flour, and 1 gram of yeast to a mixing bowl. Mix thoroughly, cover, and rest at room temperature for 4 hours. After 4 hours at room temperature, place the covered bowl into the fridge for 24 hours.
DAY 2:
Combine 450 grams of bread flour, 240 grams of water, and the dough starter from yesterday into a mixing bowl. Mix on low until it comes together into a rough ball. Add 18 grams of salt and 9 grams of sugar or honey and mix on medium speed for 10 minutes. With 1 minute left on your timer, add a dash of olive oil.
Shape your dough into a ball (doesn’t need to be perfect), and put it in a large and lightly oiled container. I typically use the mixing bowl I used to make the dough in. Cover with cling wrap and/or an air-tight lid. Let rest for one hour, then split into two evenly sized dough balls. Each dough ball should weigh close to 500g and be perfect for one 16″ pizza.
Put the dough balls into the fridge in covered and oiled containers for 24-48 hours.
DAY 3+:
Take your dough out of the fridge roughly 2 hours prior to when you want to begin baking these pies.
Preheat your oven to 550°F (285°C-290°C) with a pizza steel on the middle rack 1.25 hours prior to when you want to begin baking. You could use a pizza stone instead, but a steel is recommended as it has higher heat retention properties.
Next, I make my sauce:
28oz can of whole peeled San Marzano tomatoes, you can drain some of the liquid off if you’d like but it’s not essential. Di Napoli brand is my favorite rn
2g salt
2g oregano
12g sugar
Combine all ingredients into a container and immersion blend. One batch of sauce should get you through 4 of these pizzas, so feel free to make a double batch of dough.
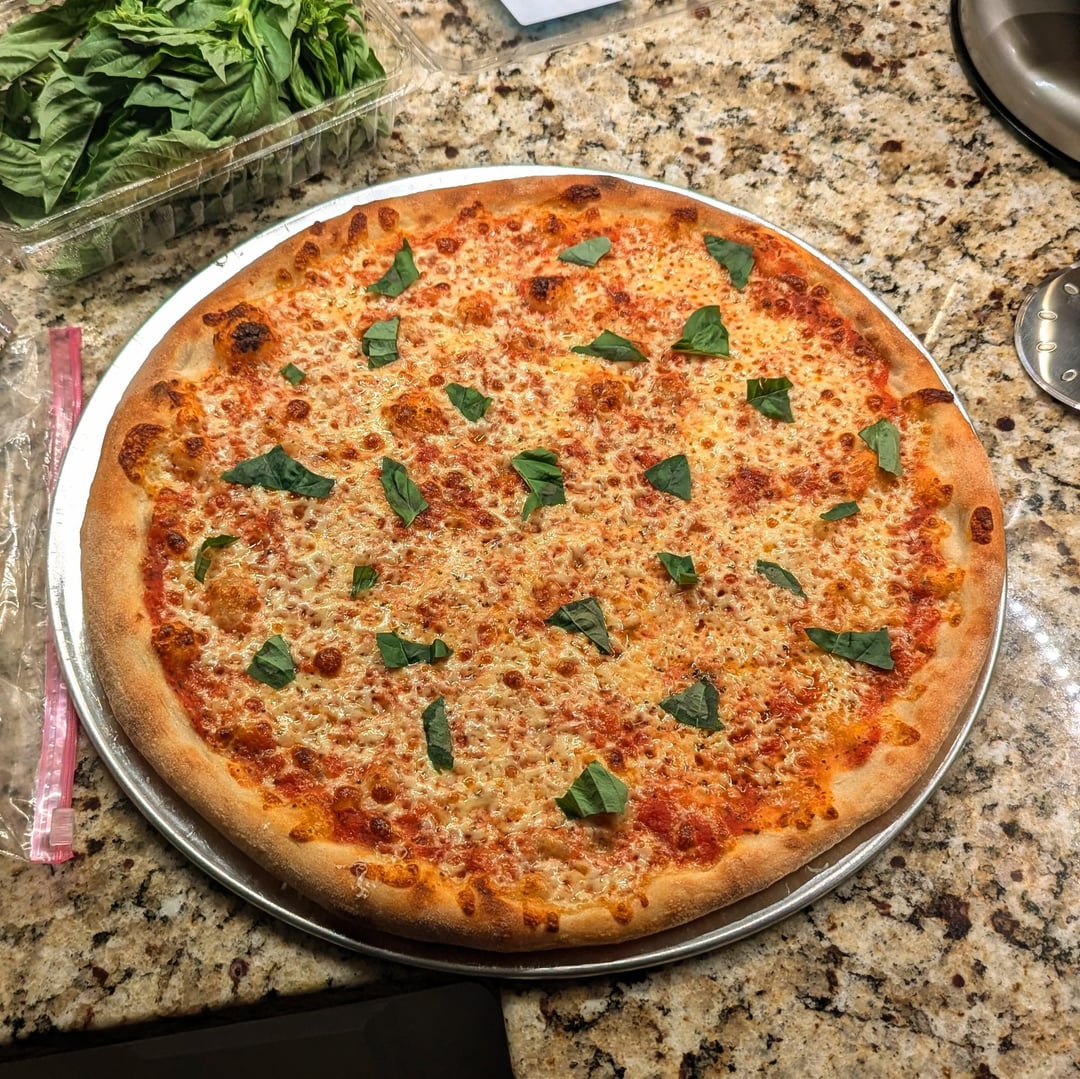
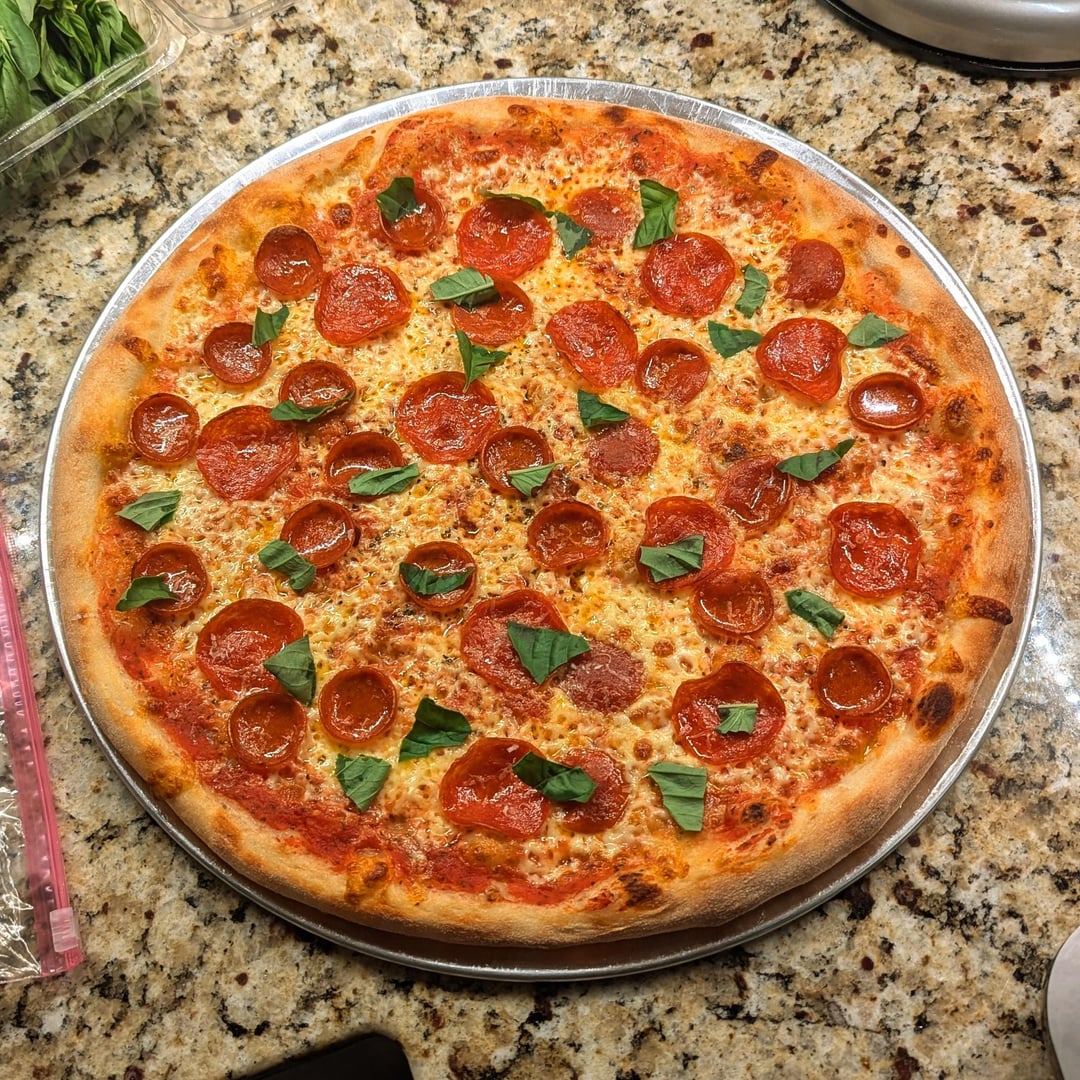
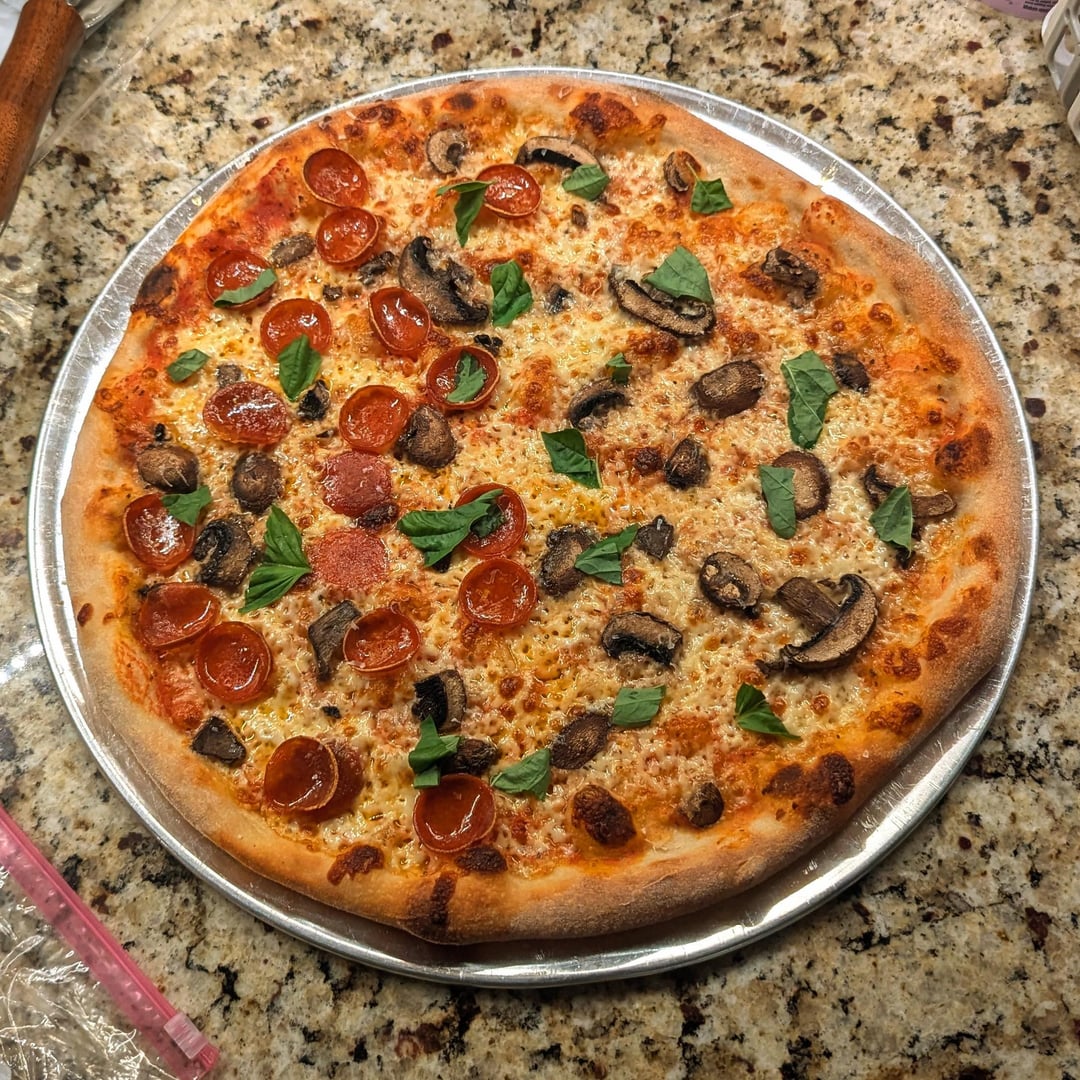
Put Semola flour in a bowl and put the dough on top of the flour to make sure that it sticks to the crust. Coat the dough ball completely in Semola flour. Sprinkle some additional Semola flour on your work surface. The smoothest part of your dough ball (the top) will be the bottom of the crust of the pizza. Put the dough on your work surface and press/stretch. Pick up the dough so it’s in both of your hands. Stretch the dough until it’s about the size of your pizza screen. Lift the dough onto your pizza screen. If you are worried about your pizza sticking to the screen (might happen if your screen isn’t seasoned), do a light spray of a high smoke point oil (avocado, grape seed) and rub it into the screen with your hands. Top the dough with sauce, then shredded or sliced mozzarella cheese. I ONLY use low-moisture whole milk Mozzarella, and 8oz is typically the right amount of mozz.
Pizza + screen go directly on the steel for 3 minutes. Once the bottom of the pizza has some structure and holds its shape, remove the pizza + screen, remove the pizza from the screen with your metal peel, then put the pizza back in the oven directly on the steel. Alternatively, you can lift up the pizza with your peel and use metal tongs to shimmy the screen out from underneath the pizza. Once the bottom looks crispy and browned, assess the top of the pizza and decide if you want to broil.
If the top looks underdone compared to the bottom: take the pizza out of the oven, back on the screen, then pizza + screen go back into the oven but near the top rack with the broiler on. Once the top looks good, remove the pizza from the oven.
Once the pizza is out of the oven, add any finishing touches. Here are a few options:
– Fresh Basil
– Red Chili Flakes
– Garlic butter (brushed onto the crust)
– Parmigiano Reggiano (grated or shredded)
Slice, serve, and enjoy! 🍕
MagazineDelicious151 on
Looks really good
chillm on
Looks amazing. Clearly you put the time in.
salsanacho on
My pizzas always end up in the shape of a drunk amoeba, I’m impressed how consistent and uniform yours are. Looks great!

4 Comments
NY STYLE PIZZA IN A HOME OVEN RECIPE:
DAY 1:
Add 150 grams of warm water (90°F-100°F, 32°C-37°C), 150 grams of bread flour, and 1 gram of yeast to a mixing bowl. Mix thoroughly, cover, and rest at room temperature for 4 hours. After 4 hours at room temperature, place the covered bowl into the fridge for 24 hours.
DAY 2:
Combine 450 grams of bread flour, 240 grams of water, and the dough starter from yesterday into a mixing bowl. Mix on low until it comes together into a rough ball. Add 18 grams of salt and 9 grams of sugar or honey and mix on medium speed for 10 minutes. With 1 minute left on your timer, add a dash of olive oil.
Shape your dough into a ball (doesn’t need to be perfect), and put it in a large and lightly oiled container. I typically use the mixing bowl I used to make the dough in. Cover with cling wrap and/or an air-tight lid. Let rest for one hour, then split into two evenly sized dough balls. Each dough ball should weigh close to 500g and be perfect for one 16″ pizza.
Put the dough balls into the fridge in covered and oiled containers for 24-48 hours.
DAY 3+:
Take your dough out of the fridge roughly 2 hours prior to when you want to begin baking these pies.
Preheat your oven to 550°F (285°C-290°C) with a pizza steel on the middle rack 1.25 hours prior to when you want to begin baking. You could use a pizza stone instead, but a steel is recommended as it has higher heat retention properties.
Next, I make my sauce:
28oz can of whole peeled San Marzano tomatoes, you can drain some of the liquid off if you’d like but it’s not essential. Di Napoli brand is my favorite rn
2g salt
2g oregano
12g sugar
Combine all ingredients into a container and immersion blend. One batch of sauce should get you through 4 of these pizzas, so feel free to make a double batch of dough.
Put Semola flour in a bowl and put the dough on top of the flour to make sure that it sticks to the crust. Coat the dough ball completely in Semola flour. Sprinkle some additional Semola flour on your work surface. The smoothest part of your dough ball (the top) will be the bottom of the crust of the pizza. Put the dough on your work surface and press/stretch. Pick up the dough so it’s in both of your hands. Stretch the dough until it’s about the size of your pizza screen. Lift the dough onto your pizza screen. If you are worried about your pizza sticking to the screen (might happen if your screen isn’t seasoned), do a light spray of a high smoke point oil (avocado, grape seed) and rub it into the screen with your hands. Top the dough with sauce, then shredded or sliced mozzarella cheese. I ONLY use low-moisture whole milk Mozzarella, and 8oz is typically the right amount of mozz.
Pizza + screen go directly on the steel for 3 minutes. Once the bottom of the pizza has some structure and holds its shape, remove the pizza + screen, remove the pizza from the screen with your metal peel, then put the pizza back in the oven directly on the steel. Alternatively, you can lift up the pizza with your peel and use metal tongs to shimmy the screen out from underneath the pizza. Once the bottom looks crispy and browned, assess the top of the pizza and decide if you want to broil.
If the top looks underdone compared to the bottom: take the pizza out of the oven, back on the screen, then pizza + screen go back into the oven but near the top rack with the broiler on. Once the top looks good, remove the pizza from the oven.
Once the pizza is out of the oven, add any finishing touches. Here are a few options:
– Fresh Basil
– Red Chili Flakes
– Garlic butter (brushed onto the crust)
– Parmigiano Reggiano (grated or shredded)
Slice, serve, and enjoy! 🍕
Looks really good
Looks amazing. Clearly you put the time in.
My pizzas always end up in the shape of a drunk amoeba, I’m impressed how consistent and uniform yours are. Looks great!